
Slow internet speeds are incredibly frustrating. You pay a boatload of cash to your internet service provider, and your connection is spotty and slow.
Many things could be causing delays in your connection speed. We’ll go over each of these things at the end of the article, but we’re going to focus on your DNS or domain name system for now.
What’s that, you ask? A DNS is essentially a map of the internet. Think of it as a road map, with all of the web addresses you frequently visit and millions more that you don’t.
When you sign up for internet service, your provider assigns you to its DNS server. However, that isn’t always the best one to use. It could be bogged down with traffic, running inefficient software or any number of other problems.
If your computer can’t look up IP addresses quickly, it seriously slows down browsing. Fortunately, there are other DNS servers out there you can use. Keep in mind that speed isn’t the only reason to choose a new DNS. Many DNS systems include filtering to block inappropriate websites or other sites you don’t want to see.
Why your DNS server matters
While having your ISP assign your DNS servers automatically is convenient, it opens up its own set of issues. Depending on your provider, its DNS systems can be slow and inefficient, gumming up internet speeds.
Another issue is security. Using your ISP’s DNS servers allows it to track your activity like searches and the sites you visit, opening up all sorts of privacy issues. Many tech companies are opening up their own speedy and secure DNS systems to the public to address these concerns.
Phone book for the internet
A DNS or domain name system is often called the phone book for the internet. It’s a critical component of how the whole internet works, and it can dictate how fast and secure data is delivered to you.
Here’s a simple way of putting it. A DNS server translates IP addresses of websites to domain names that are easier to read and remember. For example, Google.com is translated to the IP address 74.125.239.2 and vice-versa. The communication between your computer and a DNS system is critical to direct web traffic correctly.
Best DNS servers you can try
There are many free options for alternate DNS servers, but here are the most popular and reliable ones. Some, like Quad9 and Cloudflare, even have built-in security features.
OpenDNS
- 208.67.222.222
- 208.67.220.220
- 8.8.8.8
- 8.8.4.4
Cloudflare
- 1.1.1.1
- 1.0.0.1
Quad9
- 9.9.9.9
How to switch your DNS server on Windows
1. Pull up Network Connections by right-clicking on the Start menu and tapping Network Connections.
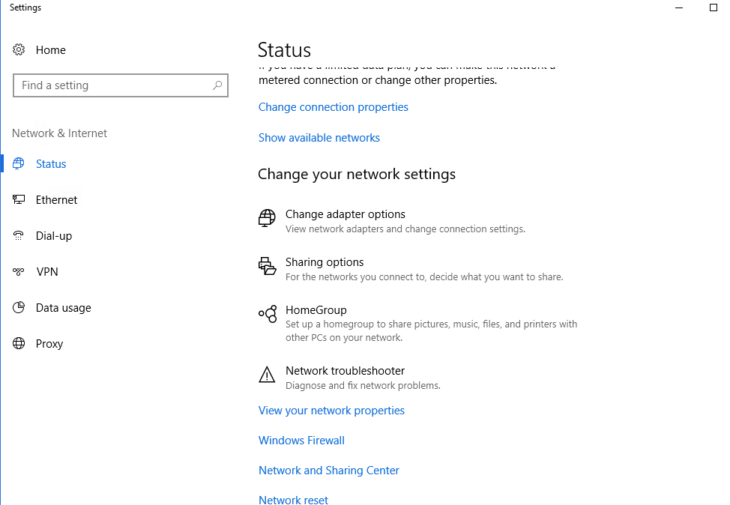
2. Now click Change adapter options. You’ll see your current network; right-click and choose Properties.
3. Select Internet Protocol Version 4 (TCP/IPv4) and click Properties.
4. Select Use the following DNS server addresses and then Type the DNS server addresses into the Preferred and Alternate DNS server fields:
For this example, we’re using OpenDNS (but you can put other servers in these fields too):
- 208.67.222.222
- 208.67.220.220
5. Click OK.
How to set up your DNS on a Mac:
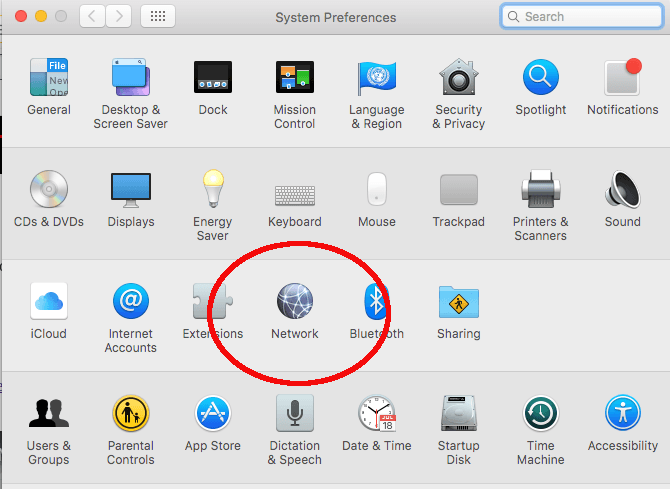
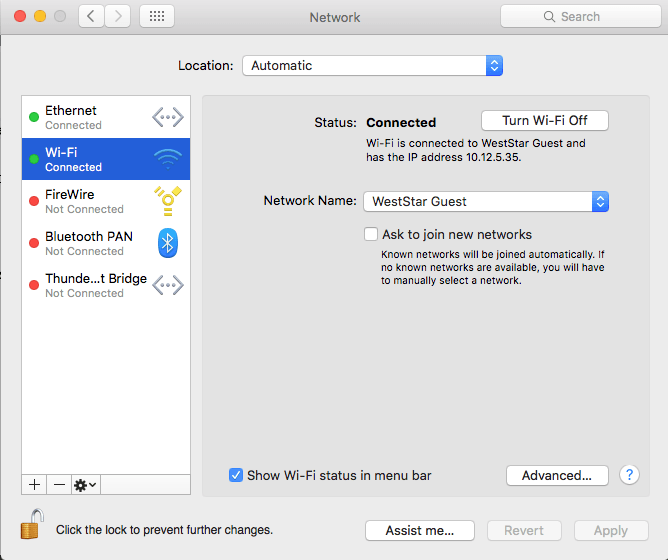
1. Open System Preferences, then select Network. Click on the Advanced button.
2. Next, go to the DNS tab.
3. Click the plus (+) sign on this tab, then type your preferred DNS server address.
In this example, we’re using Quad9’s DNS server (but feel free to enter other DNS servers of your choice):
- 9.9.9.9
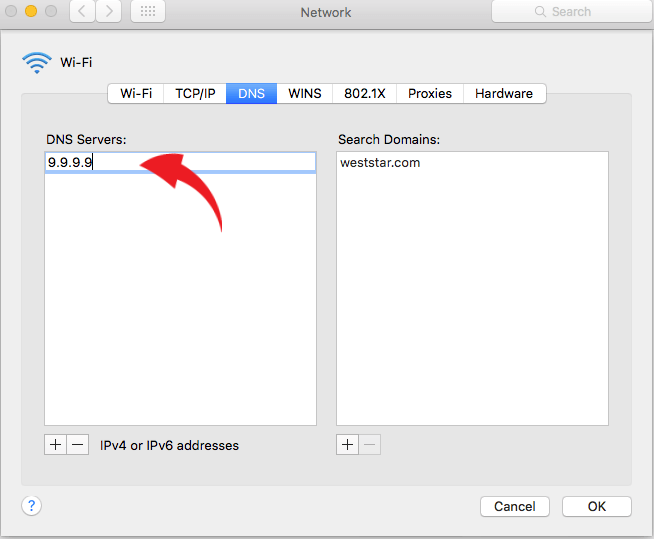
4. Press OK, and you’re set!
Note: You may need administrator rights to make these changes if you’re on a company-managed device or network.
How to set up your DNS on an iPhone:
- Open the Settings app on your iPhone, then tap Wi-Fi.
- Tap blue letter i inside the blue circle next to your preferred Wi-Fi network to access its settings.
- Tap Configure DNS, then select Manual.
- Delete your existing DNS servers by tapping the minus sign then the Delete button.
- Tap the + Add Server button, then type 1.1.1.1.
- Tap + Add Server again, then type 1.0.0.1.
- Tap Save to lock in your settings.
How to change your DNS on Android:
Changing the DNS settings on an Android gadget is more complicated than on an iPhone, but you can download and use a free but ad-supported app called DNS Changer. As always, keep in mind that setup instructions for Android gadgets vary based on your make, model and OS version.
1. Once DNS Changer is installed, open the app, choose Custom DNS (Enter manually) in the drop-down box.
2. In this example, we’ll be using Google’s DNS servers, but you can input other DNS servers too. Just type in the numbers on the provided fields
- 8.8.8.8
- 8.8.4.4
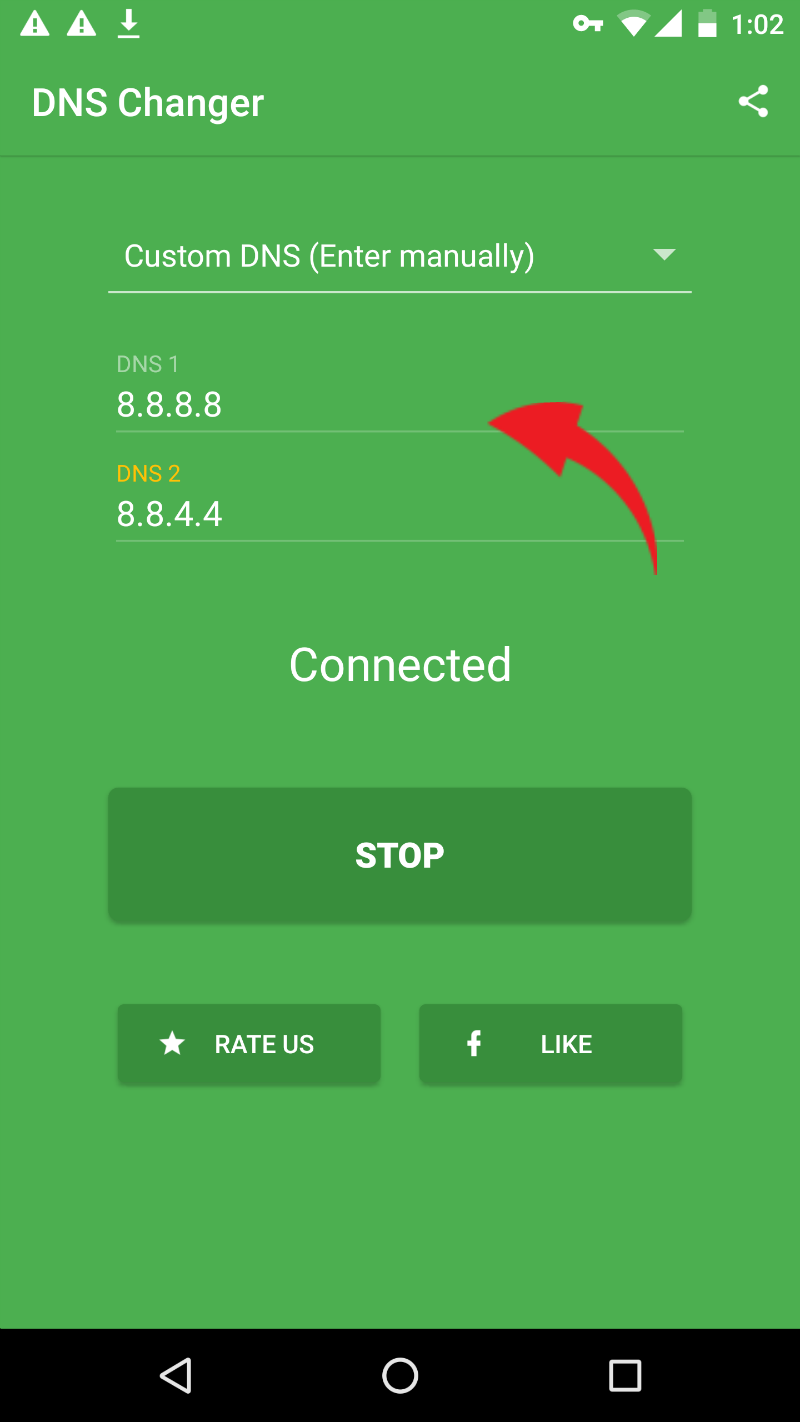
3. Click Start, and the app will connect to the internet via a local VPN network using the specified DNS servers.
Other tips to speed up your internet connection
Router problems: Get better Wi-Fi by checking the settings on your router.
Dead zones: You may find areas of your home with horrible Wi-Fi connections. Try using a mesh router, and don’t worry about dead zones ever again. Tap or click here for a simple way to boost your Wi-Fi that won’t break the bank.
Connection speeds: If your internet service provider is the source of the slow speeds on your network, you have a few options. One, you can talk to them and see if another plan would better meet your needs. Or two, you can switch service providers altogether. A different provider may have a better infrastructure in your area.
Thieves: The easiest way to prevent thieves from accessing your network is to secure your network with a strong firewall and password. Tap or click here to find your router’s current password and change it. Tap or click here for a free, lightweight firewall.