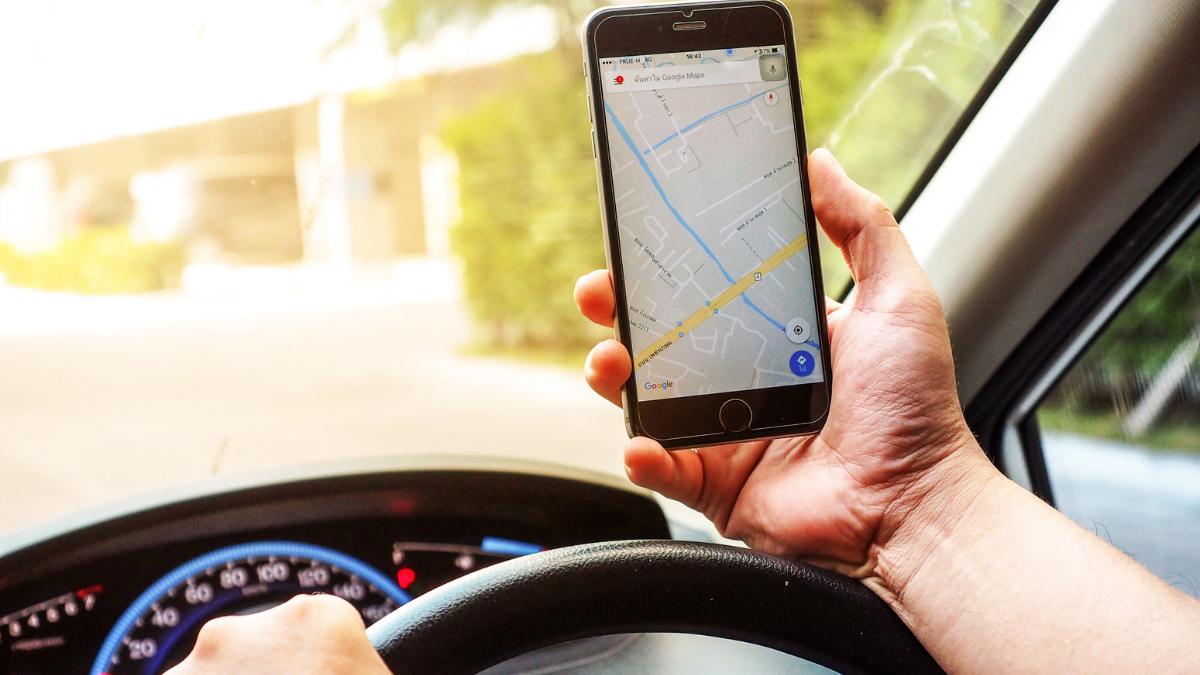
Thanks to the constellation of satellites, we can use GPS to chart our paths. We don’t have to worry about getting lost in new areas because navigation apps help us find our way through unknown territory. They also offer plenty of secret GPS settings you should know about.
Since Google Maps and Apple Maps have been around for so long, developers have had ample time to develop new features. You may have missed some of the most valuable updates, like voice control capabilities or the ability to track your parked car. Here are secret GPS settings you can start using today.
Let’s start with Google Maps
We’re starting with Google Maps because it’s at the top of its game. Here are ways to make the most of it.
1. Use Google Maps in incognito mode
That’s right: You can navigate privately. If you’re wondering why this is an option, you may not know all of your visits are saved to your Google account. This means people may be able to see where you’ve been.
One researcher was able to see everywhere his wife went. It all came down to the Google Maps Timeline feature. Tap or click here for the story behind a feature that tracks your every movement.
Bottom line: Google knows where you go. Turn on incognito mode if you don’t want a visit saved to your profile. This way, Google Maps won’t keep your search history or update your location history.
How to turn on Incognito mode on iPhone or iPad
- First, open Google Maps on your iPhone or iPad.
- Then tap your profile picture in the top right corner.
- Lastly, tap Turn on Incognito mode.
How to turn on Incognito mode on Android
- First, open Google Maps on your Android.
- Next, tap your profile picture in the top right corner.
- Then, tap Turn on Incognito mode.
RELATED: Incognito mode doesn’t do what you might think – Here’s the truth
2. Order rideshare through Google Maps
Rideshare services are all the rage nowadays. That’s why Google Maps has a built-in feature that lets you find a ride from its app. Here’s what to do:
- On your mobile phone or device, open the Google Maps app. Make sure you’re signed in to your Google Account.
- Search for your destination or tap it on the map.
- For rideshare, make sure you select both your starting point and destination.
- At the bottom left, tap Directions.
- At the top, tap Rides. NOTE: It’s an icon that looks like a person holding up their hand. A list of services, prices, and times appears.
- To check the price for a ride: Select a ride-service provider.
- Choose the service you want to use.
- If you have the service’s app on your device: the app will open.
- If you don’t have the service’s app: the App Store will open to download it.
- To finish your ride request, follow the instructions in the provider’s app.
RELATED: Get the most out of Google Maps with Street View features
3. Add stops to a trip
Open Google Maps and enter your destination. Once the app knows your starting and stopping point, it’s time to add a stop. Tap the three dots in the right-hand corner. Then, tap Add Stop.
It will look something like this:
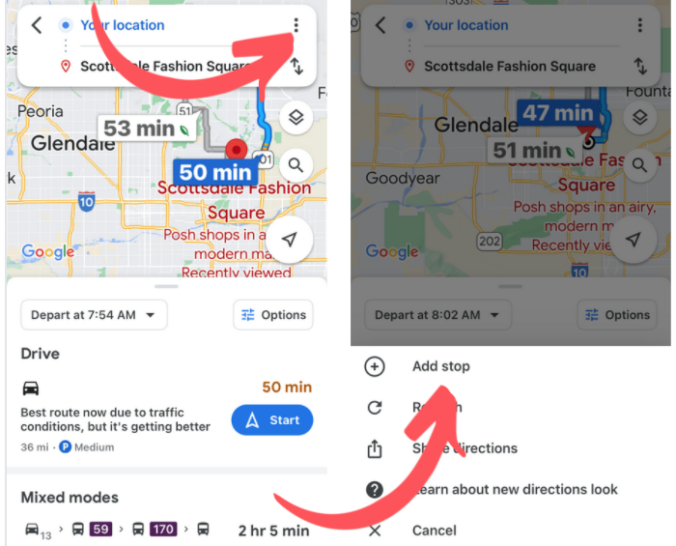
If you want to reorder the stops, you can do so. Just tap and hold a destination to move it around. Tap Done when it’s in the correct order.
(Fun fact: You can add up to nine stops on Google Maps. It’s an excellent option for busy bees constantly buzzing from point A to B!)
4. Where to find your parked car
I once wasted 15 minutes looking for my vehicle on the wrong side of a parking lot. Then I started saving my parking spot on Google Maps. It’s easy to set up:
- Open Google Maps on your smartphone.
- Tap the blue icon that represents your location.
- Tap Save your parking on Android. For iPhone, tap Set as parking location.
Until you remove it, Google Maps will save your parking spot. NOTE: On Apple devices, Google Maps will save your parking information only if you have location services set to Always. You can find instructions on how to set locations for Apple devices here.
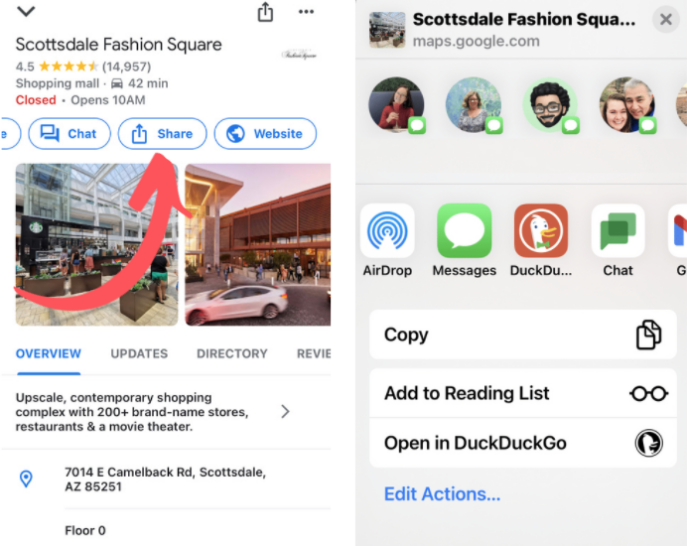
5. Share Maps with friends
This is a helpful trick to have in your back pocket if you’re separated from friends and family. Sharing a location or a map with friends can help you find each other. Follow these steps to share a place, business, address, Street View image or directions.
How to share a map on iPhone
- Open Google Maps.
- Find a place on the map. Then, touch and drop a pin. (You can also search for a location.)
- At the bottom, select the place’s name and address. Then, select Share. (If you don’t see it immediately, tap More, which will reveal Share.)
- Then, choose if you want to share this map or location through your messaging app or another app on your phone.
Here’s what it may look like on your phone:
How to share a map on Android
- Open Google Maps and either search for a place or drop a pin.
- Then, select the place’s name and address.
- Select Share. (If you don’t see it, tap More > Share.) Choose which app you want to send the location through.
Just like that, you shared the link to your map. Want even more GPS secrets? Tap or click here for 10 hidden Google Maps tips and tricks.
Here are three Apple Maps tricks
Now that you know some of our favorite secret GPS settings in Google Maps, it’s time to move to Apple Maps. Check these out.
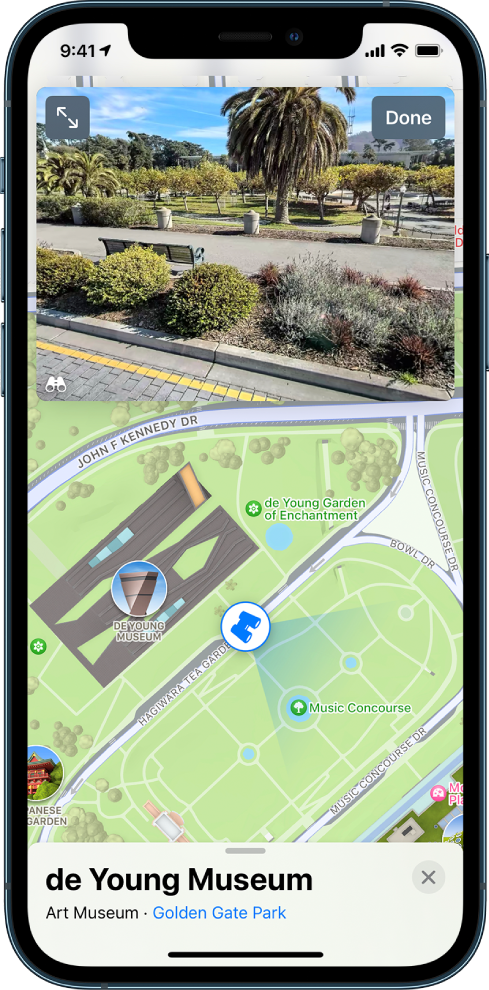
1. Look around the streets
You’ve probably heard of Street View from Google Maps. Here’s the Apple version. Tour the streets and look through any location you look up with this feature.
Here’s how to look around streets in Apple Maps:
- In select cities, tap the binoculars icon near the bottom of a map.
- To change the view, do any of the following:
- Pan: Drag a finger left or right.
- Move forward: Tap the scene.
- Zoom in or out: Pinch open or closed.
- View another point of interest: Tap elsewhere on the map.
- View another point of interest: Switch from full-screen view, then tap elsewhere on the map.
- When finished, tap Done.
2. Share your ETA during navigation
Sometimes, your friend gets to your meeting location before you do. You want to let them know when you’ll arrive. Luckily, you can share your estimated time of arrival in a snap.
- Open Apple Maps.
- Tap the route card at the bottom of the screen, then tap Share ETA.
- Choose one or more suggested contacts, or tap Open Contacts to find a contact.
3. Clear your location history
Like Google Maps, Apple Maps remembers your searches if you want to revisit a place you looked up in the past. You may want to delete your history for privacy reasons. Just open Apple Maps and swipe up to open the information panel.
You’ll see your history under Recents. Tap Delete to delete a specific location. To delete your complete history, tap See All > Clear.