
We all love a good update, and Apple is known for bringing in some real power each time they launch a new operating system. Tap or click here for the best tips and tricks in iOS 15. The trend continues with the introduction of macOS Monterey.
The Monterey update brings tons of updates to your Mac, optimizing productivity and making the synchronization between Apple devices easier than ever.
From live text to notable improvements to FaceTime, this update is packed. Instead of wading through them all yourself, we did the work for you. Here are eight of the best new macOS features you have to try.
1. Live text

This feature is seriously cool. You can copy and paste text right from a photo. If you want to analyze the text from a picture on your Mac, open an image with text in the Preview app.
Hover your pointer over the text. Then, drag the pointer to select it. You have a few different options from there. You can:
- Copy
- Translate
- Look up the meaning
- Search the web for the text
- Share the text
Say there’s an image with an email address. You send an email by control-clicking your selection, hitting the down arrow and then picking from a list of options. You can add it to your contacts list, send out an email, or even start a FaceTime call.
Say there’s an image with a phone number, like this:

With this feature, you can control-click your selection, hit the down arrow and then start to call the number in an image. You can start a FaceTime call, send a text, look it up or add it to your contacts list.
This also works for websites addresses within images. You can open a link on your browser or use Quick Look to see the site’s information.
Even better, all Live Text features are done on your device. That means personal information stays on your Mac … which makes it harder for hackers and other cybercriminals to swoop in and steal your data. Tap or click here for five essential Mac security settings you should enable now.
2. FaceTime improvements

With the latest update, you can simultaneously watch TV while chatting with a friend over FaceTime. You can listen to albums with friends through a shared queue. Oh, and there are a ton of other key features and enhancements, like:
- Calendar integration
- Voice isolation mode
- Spatial audio
- Multiple device support
- Sycned playback
- Screen sharing
That’s just the tip of the iceberg. While there are too many FaceTime improvements to highlight all at once, the real winners are Portrait mode and Grid View. Grid View mimics Zoom when you are in a group call, allowing you to see everyone at once. Locate the speaker easier when Facetime highlights whose talking in your group call.
Portrait mode now allows you to put the focus where it matters, on you! This feature blurs the background just like portrait mode on your camera. Note: This feature is also available for M1 Macs only.
3. Safari

Searching the web just got a whole like easier with tabbed groups on Safari. With a redesigned sidebar and drop-down menu, you can create groups based on what works for you. Your tabbed groups will stay the same across every Apple device, so you can stay on task or have easy access to your favorite sites on your Mac, your iPad and your iPhone.
Not only that, but there are new privacy protections to keep you safe. Intelligent Tracking Prevention will stop trackers from using your IP address to profile you. Tap or click here for the 20 websites most guilty of tracking what you do online.
4. Shortcuts
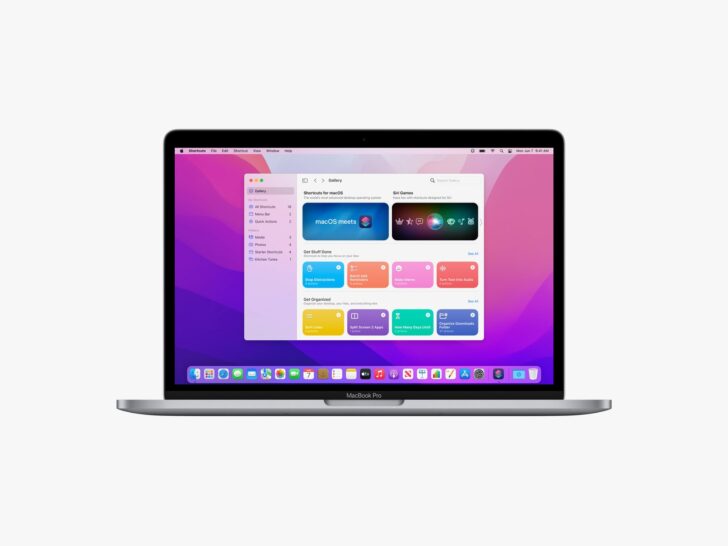
Good news: Now shortcuts will sync across all devices. That means you can make a change on your Mac and find it on your iPhone simultaneously. You can run shortcuts from the menu bar, Finger, Dock, Siri or Spotlight.
Plus, you can share shortcuts with friends or online groups. No, you don’t have to include a step-by-step guide. Actually, it’s as easy as sharing a link. Here’s how you can be more productive with shortcuts.
Speaking of shortcuts: Tap or click here for a few clever Mac keyboard shortcuts you’ll use time and time again.
5. Focus

Depending on how many apps you use, notifications can become a problem. With the new Focus feature, you can choose which notifications are important and which ones can wait till later.
Are you busy working and don’t want anyone to bother you? There’s a Focus feature for that, too.
To turn it on, first head to the Control Center icon, which you’ll find in the menu bar. Then, click Focus and choose between Do Not Disturb or choose between a few preset options. If those don’t work for your situation, you can create your own.
6. Quick Note
If you use iPadOS 15, you’re probably familiar with Quick Notes. In the Monterey update, this feature migrated to Macs. It’s an even more robust note-taking tool than the Notes app.
For starters, it lets you take notes no matter what you’re doing. All you have to do is bring your cursor to your display screen’s bottom-right corner. This pops up a white box; click on it to start working.
There, you can write down an idea, insert a link or save a photo. You can even add tags to make them easier to find later on.
All of your Quick Notes are saved in a designated section within the larger Notes app, which you can access this across any and all of your devices. You can also add Mentions and look over past activities.
7. Messages
Do you and your friends and family share a ton of pictures, videos and articles with one another? Do you tend to lose track of what they send you? Mac has your back.
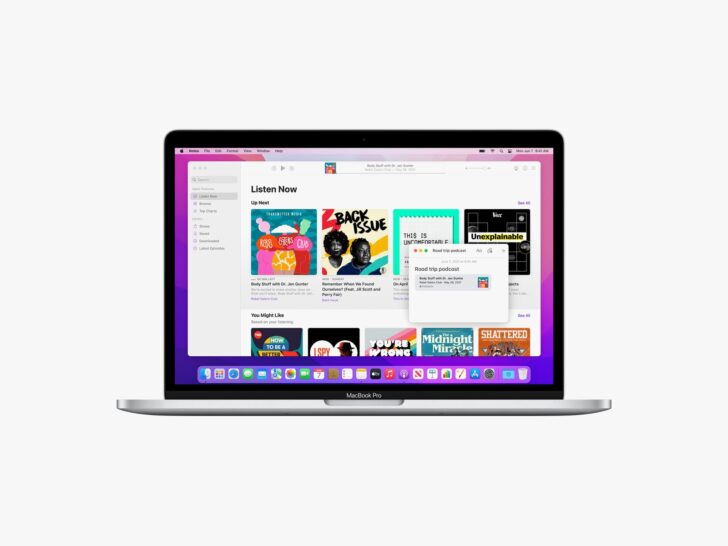
This new update introduces the Shared with You feature. Here’s how it works. When someone shares content with you over the Messages app, Apple plops it into a special section you can find on whichever app you would need to use to view that content.
For instance, say a friend shares a cool podcast with you, saying to check it out later. When you open up Apple Podcasts, you’ll see a brand-new Shared with You section, which contains the podcast sent to you earlier. Basically, it’s a great way to circle back to cool stuff you may have missed.
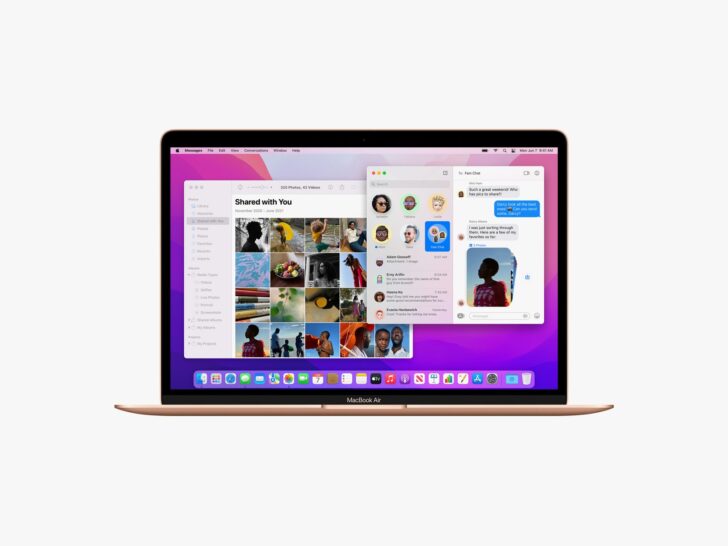
You can even use the Shared with You feature to continue conversations after they petered out. Say you and the friend who sent you that podcast moved on to other topics. Once you open it in Apple Podcasts, you can send it back to your friend to remind them and then start talking about it through Messages.
Of course, this applies to anything they share, not just podcasts. This feature works on the Music, Apple TV, News, Photos, Podcasts and Safari apps. Here’s how to use it:
- On one of these apps, head to the Shared with You section.
- Tap on whatever was shared with you.
- You’ll see a “From [Friend Name]” label near the content they sent earlier. Tap it.
- Now you can reply to that shared content by tapping the Send button.
This is yet another way to make communication a breeze. Here’s another tip for digital chatterboxes. Tap or click here to find out how to save text messages on iOS and Android.
8. AirPlay to Mac or TV

If you were ever jealous of mirror functions on other devices, now you can use your Mac like your TV and mirror content from your iPhone or iPad. We put together a few steps to follow.
How to stream a video from smartphone to your TV
First, pull up the video on your iPhone, iPad or iPod Touch. Next, connect that device to the same Wi-Fi network as your smart TV. (According to Apple, it should be or Apple TV or an Airplay 2-compatible smart TV.)
Depending on your device, you may see the AirPlay button. In that case, click it. If not, you’ll have to tap a different button like Share first, which opens up the AirPlay option.
From there, you’ll see the option to connect it to your smart TV. Select it and you’re good to go. When you want to stop streaming, tap AirPlay in the app you’re streaming from. Then, select your device to disconnect.
How to mirror your smartphone to a TV or Mac
First, connect your device to the same Wi-Fi network as your Smart TV or Mac. Then, open the Control Center. The steps to get here differ based on your device’s model and operating system.
- iPhone 8 or earlier: Swipe up from the bottom edge of the screen.
- iPhone X or later: Swipe down from the upper-right corner of the screen.
- iOS 11 or earlier: From the bottom edge of the screen, swipe up.
- iPad with iPadOS 13 or later: From the upper-right corner of the screen, swipe down.
From there, select the Screen Mirroring option. You’ll see a list of devices to connect to. Pick the smart TV or Mac you want to connect to. You may see an AirPlay passcode pop up on your Mac or TV.
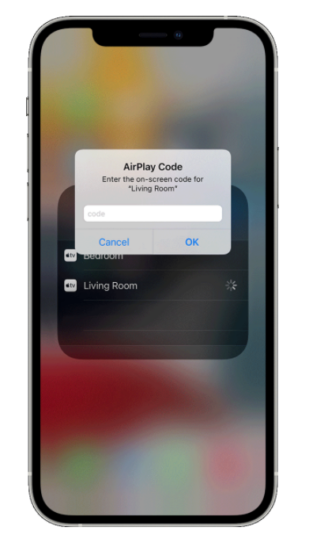
In that case, just enter the code onto your iOS or iPadOS device. After that, you can always stop by opening Screen Mirroring and tapping Stop Mirroring.